Support / Bob PetHair / Checkup Test
Checkup Test
Home Checkup System
If Bob is not performing as well as he should, you can diagnose the problem with a simple home checkup test. If Bob fails any part of the checkup test, he may need a replacement part. In this case, please call our customer care center at 1-888-549-8847 for toll-free support in the US and Canada, or email us at support@bobsweep.com. Our hours are Monday – Friday 9 am – 5 pm, PST.
To put Bob in checkup mode:
1. Flip Bob's power switch OFF and place him on a light-colored surface.
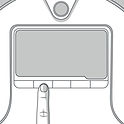
2. While holding down the UV button on Bob’s cover, flip Bob’s power switch ON.
3. Bob will chirp three times to let you know he is now in checkup mode. You may release the UV button. Do not press any additional buttons.


Step 1: Edge Sensors
- You should see DIRT, MIN. CLEANING, CAPACITY, and CHARGING lit on Bob's screen.
- If all four lights do not turn on, flip Bob over and clean his edge sensors. See if all four lights turn on now.
- Lift Bob about 6 inches (15 cm) off the ground. You should see the 4 lights turn off. Place Bob back on the floor.

Step 2: Wall Sensors
- Use a thick, flat, and white surface to imitate a wall in front of Bob. Drag the imitation wall from the left side of Bob's bumper around to the right side.
- UV, AUTO, SPOT, WALL FOLLOW, and DOCK will light up one-by-one during this.

Step 3: Charging Station
- Press Bob’s UV button once. The screen will go blank.
- Place Bob about 5 inches (18 cm) away from his charging station with the middle of his bumper directly facing the sensor on top of his station. Bob’s screen should display the number 77.
- If you see a different number, make sure that Bob’s bumper is perfectly aligned with the sensor on top of his station.
- If Bob still does not display 77, clean the window on the charging station and the small hole in the center of Bob's bumper.

Step 4: Touch Sensors
- Press the UV button once more. Bob’s screen remains blank.
- Press the left side of Bob's bumper and DIRT should light up on his screen; release the left side and DIRT should disappear.
- Press the right side and MIN. CLEANING should light up; release the right side and MIN. CLEANING should disappear.
- Press the center of the bumper and DIRT and MIN. CLEANING should both light up on the screen.

Step 5: Display Screen
- Press the UV button one more time. Each icon on the screen should light up in a repeating rotation.
- Press the UV button again and every light on Bob's screen should light up and remain solid.

Step 6: Brush and Vacuum Suction
- Press the PROGRAM button. Both the main and side brushes should spin, and air should flow out of the back of Bob's dustbin.
- If you do not feel air flowing out of the dustbin, then Bob's vacuum motor may need to be replaced.
- If the brushes are not moving, remove and clean them before repeating the test
Ignore the icons and numbers on the display screen during test mode.

Step 7: UV Light and Wheels
- Lift Bob off the floor or place him on his side to keep him from running away!
- Next, press the MODE button and his wheels should drive forward.
- Flip Bob over and you should see his UV lamp lit. Do not look directly into the UV lamp.
- Press the MODE button once more. Bob’s wheels should drive backwards and his UV lamp should turn off.

If Bob completes the checkup test without any issues, then his internal parts are working properly!


